Monday, August 30, 2010

Prima Say it in Crystals

Those of you who know me, know how much I love bling!   Well Prima Marketing Say it in Crystals has to be one of my all time favorite bling related companies!  I just love the crystal flourishes and they keep coming out with such wonderful designs and have included pearls as well!

I recently did a review of Prima's Say it in Crystals over at Craft Test Dumies all about Prima bling and it is the brand new release from CHA Summer.  I want to make sure that I put the step by step instructions for the designs on my blog so you would know how to recreate the designs that I made if you desire.  That information is below. 

Before you begin, make sure you head over to Craft Test Dummies and read the review post first since it has so much information you will want to read!

I have two projects here and the first I will list step by steps for will be the canvas project you see above.

1. Start with an 8"x10" canvas
2. Use a border and corner punch to create a decorative frame that fits your photo.
3. Cut a strip of purple cardstock wide enough to hold the Crystal Swirl piece. I used a flourish stamp and watermark stamp pad to create a light pattern to my purple cardstock. Then I added a thin border of darker purple cardstock that coordinates with my frame behind the crystal panel.
4. Next place the Crystal swirl at the top of the purple panel.
5. Add your Cottage Blossoms to the swirl.
6. Next add some silver glitter to the Prima Craftable flower in a scattered manner.
7. Plade the Prima Love Letter Rose on top of the glittered flower and attach at the bottom of your Crystal swirl.
8. Last I added some glittered chipboard letters to spell "mom" at the bottom.


The next project is an easy birthday card.

1. First I cut apart two of the Say it in Crystal Colorful Lines to use on this card. Then I traced along the edge of my brown paper and cut along the line so the crystals would be a perfect fit.
2. I covered my card blank with striped paper and then attached the brown curved cut paper on the top.
3. Then I attached my Prima Say it in Crystal Colorful Lines along the edge as shown.
4. Next I took one flower from each of the 3 packages and attached on top of the Crystal strips in a cluster
5. On my computer I printed out Happy Birthday strips in blue ink, cut them and placed them under the edge of the flowers. You could also stamp the words and cut them out as well.

Photobucket

Thursday, August 26, 2010

Heritage Layout

One of my favorite types of layouts to create are Heritage layouts. Something about old pbotos just fascinate me. It takes you back to the days when life seemed less complicated. Anyway, this photo is some of my ancestors from many years ago and I love it. Look how stoic they are in the photo! Seems now we never want to take a photo without smiling!

If you want to read more about this layout and how I created just hop over to Crafts Unleashed and take a closer look!

Crafts Unleashed, Heritage layout


Photobucket

Tuesday, August 24, 2010

Favor.....

Wondering if I can ask a favor of all of you? The Gingerbread jar I create above has been entered on a challenge blog in a contest. I am wondering if you will click the link below, look off to the right hand side of the page for the voting poll (may need to scroll down just a bit) and place a vote for my Gingerbread jar? I would really appreciate it!

Click here to vote for my gingerbread jar

Photobucket

Sunday, August 22, 2010

Scrapbook Project Kits


Some of you know, and some of you may not know that I have a website where you can go to purchase scrapbook project kits.  These kits are all made up for you with the papers and embellishments along with a set of full color photo instructions.  I've done the shopping, the coordinating, the designing, and some of the cutting work for you.  All you have to do is sit down and put it together.  I started this website in June and I am having so much fun with it!

Once a kit sells out then it moves to the previous kit page and the instructions then become available.  Right now there is the Good Eats Recipe album that sold out a few weeks ago and now the instructions are available! 

In September I will be releasing one complete kit and the second project is going to be just instructions.  Many of you have said that you would like to be able to purchase instructions more quickly so I decided to try it this way for September.  So if you have been waiting for some instructions without having to purchase an entire kit, then September is the month for you! 

If you are a kit person like me and would rather have everything ready for you then there is a great selection of kits on my current kits page as well.  This month features a vacation mini album and a beautiful boxed card kit. 

Please let me know if you have any questions! 

Photobucket

Friday, August 20, 2010

Inspired by projects

Over the past several days I hope that I have inspired you with several projects! Now it is your turn to inspire others!

If you have a project that you would like me to share on my blog please send me an e-mail at lfalduto at charter dot net. In the e-mail include a photo and a short description of your project and I will share it with my blog readers. I have 197 blog followers and over 1300 Facebook friends and my blog feeds directly to my Facebook page! So you will have lots of folks admiring your work!

I cannot wait to see what projects you send to me to share!

Photobucket

Wednesday, August 18, 2010

Garden Party Favor

It is harvest time here in Wisconsin.  By now many tomatoes are fully ripened and ready to pick and can.  Melons and pumpkins are either ready or getting closer.  Soon we will be storing food for another long and cold winter here. 

Before summer is completely over why not host a little garden party.  Celebrate the flowers you still have in bloom and a wonderful summer growing season.  I've created a little garden party favor box which you could fill with candy or perhaps flower seeds for next season? 

I created the little box using my Cricut Wild Card cartridge and used some window plastic to line the inside of the window on the front.  Then I used a couple of flower punches to create the layered flowers on the front of the project.  Add some buttons and a bow for interest and dimension!

Photobucket

Tuesday, August 17, 2010

Back to School


It is that time of the year where the kids begin going back to school! I've heard that some schools have already started up for the year. My daughter doesn't start back until Sept 1st. I think she is getting bored at home with mom and is ready to go back to something a bit more entertaining!

I love making her something special for back to school to create excitement!  I will also be altering her pencil box to take so she has a little piece of home in her desk.  Afterall, I don't want her to forget about her mom while she is there all day!

So do you create anything for back to school?  Something for a child or something for a teacher? 


Photobucket

Monday, August 16, 2010

Weddings

I love creating wedding cards that are handmade.   You can really create some elegant cards by stamping and then heat embossing. 

The particular project above is a wedding invitation with a response card and coordinating envelopes.  I think the heat embossing makes the set look so professionally done!
The stamps I used are an old set from Stampin Up that I am sure they are no longer making.  But I have used this particular set over and over again because I think it make such beautiful invitations. 

Photobucket

Friday, August 13, 2010

New Tool from CHA!!!

Check out my post over on Craft Test Dummies that showcases the brand new Shape Studio from Epiphany Crafts!

Photobucket

Thursday, August 12, 2010

Altered Journal Project


So I love to alter things, right?  One of my favorite things to alter is a journal.  There is just something about creating a special book to write in that excites me.  This is my latest altered journal made with some pre-made embellishments and a beautiful Cricut layered butterfly?  Notice the swirled design on the butterfly?  The top layer is cut from a transparency and then stamped with permanent brown ink on the transparency.  I also added wire antennae's to my butterfly using some copper wire.  I think the more textures you can add to a project the more interesting the project is!

I also used some Prima bling on the journal along with a fabric covered button by K and Company.  So many fun elements on this journal.  This is actually the journal I took with me to CHA so I could keep notes in about my meetings with manufactuers. 

Remember to watch Craft Test Dummies for my posts from the show!  Don't worry, I will remind you here as well as on my Facebook and Twitter pages!

Photobucket

Tuesday, August 10, 2010

Another fun project!

If you have followed my blog for the past couple of year I know that I do not have to tell you how much I love flowers! It seems like I add flowers to many of my projects. For some reason, flowers just seem to make me smile.

In the above candle tin project I used my Cricut to create several tiered sizes of flowers and then I curled the petal with my embossing stylus and layered them with Zots in between. I topped each flower with a special gem or element in the center. When I created the leaves I also used my embossing stylus to create a vein down the center so I could pinch it together to create some dimension as well!

So do you like using flowers on your projects?
Photobucket

Monday, August 9, 2010

Baby Shower Centerpiece

Head over to Crafts Unleashed to see the centerpiece I made to use at a baby shower.  This is the second remake of this same candle.  The candle is one of those that you put the flickering tealight in so you can redecorate it over and over again.  The first time I did a wedding centerpiece and now the baby shower centerpiece!

Photobucket

Sunday, August 8, 2010

New project


Hello everyone!

I wanted to share a project with you that I recently created. Believe it or not I am already thinking about Christmas...crazy, huh? I love making up hostess gifts to have on hand to take along when I am invited to party. The holidays are surely a good time to have a few things just for this purpose.

As you can see above in the picture I decided to create a cookie jar for the holidays. I used my Cricut Expression to cut the die cut shapes you see on the front and top of the jar. I just love layering things and usually have dimension on all of my projects. For some reason flat just doesn't work for me!

Do you make any handmade gifts for the holidays?  I'd love to hear about what you create and see pictures too!
Photobucket

Tuesday, August 3, 2010

CHA Trends: Flowers, Flowers Everywhere

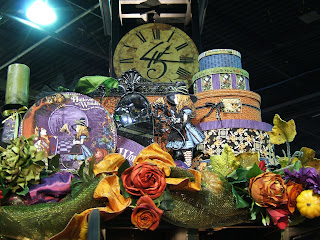
While at CHA I was watching for trends.  Lots of fun things from rosettes to banners, birds, owls, etc. But the one trend I loved the most were all of the different flowers that I was seeing!  Head over to Crafts Unleashed to see my full report!

Crafts Unleashed

Photobucket

Sunday, August 1, 2010

Summer Entertaining!

If you are like me that means you love to entertain in the summer.  Something about a backyard BBQ that if so fun and so relaxing!  Each time I entertain I like to do something to make it special.  Head over to the Crafts Unleashed blog to check out how I made this cute dip container.  You can create one too with the step by step instructions on the site.

Crafts Unleashed

Photobucket